
Deck Inspection (California): Safety Checklist, Requirements, Costs & When to Inspect
A deck inspection is a systematic evaluation of your deck or elevated outdoor structure to identify safety hazards, structural deficiencies, code violations, and maintenance needs before they lead to injury or costly repairs. In California, where decks and balconies face unique challenges—earthquake loads, coastal corrosion, wildfire exposure, and evolving building codes—regular inspections are not just recommended; they’re often required by law.
Whether you’re a homeowner conducting a quick visual check or a property manager navigating California Senate Bill 721 or SB 326 compliance, this guide explains when, why, and how to inspect your deck, plus costs, code requirements, and maintenance tips.
Get clarity fast: Use our 2-minute Compliance Quiz to see if your property requires inspection under California law, or estimate inspection costs with our calculator.
What Is a Deck Inspection?
A deck inspection is a thorough examination of all structural components, connections, materials, and safety features of an elevated outdoor platform. The goal is to identify defects that could compromise structural integrity, cause injury, or violate building codes.
Deck inspections typically cover:
- Structural framing: Ledger boards, beams, joists, posts, and footings
- Connections and fasteners: Bolts, nails, screws, joist hangers, post anchors, and metal connectors
- Guards and handrails: Height, spacing, strength, and attachment integrity (learn more about railing height codes)
- Decking surface: Boards, composite panels, fastening, gaps, and wear
- Moisture and decay: Wood rot, termite damage, fungal growth, water intrusion
- Corrosion: Rust on metal fasteners, connectors, and flashing
- Flashing and drainage: Proper water shedding away from the building
Visual Screening vs. Full Professional Inspection
A visual screening is a basic walk-through you can perform yourself, checking for obvious damage like loose railings, cracked boards, or rusty fasteners. It’s a good practice for annual maintenance but won’t catch hidden issues like concealed rot behind siding or inadequate ledger attachment.
A full professional inspection involves a licensed inspector or structural engineer who uses specialized tools (moisture meters, probes, removal of select finishes) to assess hidden conditions, verify code compliance, and provide a detailed written report with repair recommendations.
Decks and Balconies: Shared Risks
In California, the term “deck” often overlaps with “balcony” and “exterior elevated element (EEE).” Both are elevated platforms that rely on similar structural principles. California’s SB 721 and SB 326 laws apply to multi-family balconies and decks, reflecting that these structures face the same failure modes. This guide addresses both, with a focus on single-family deck inspections while acknowledging regulatory overlap.
When Do You Need a Deck Inspection?
Knowing when to inspect your deck can prevent accidents and expensive emergency repairs. Here are the most common triggers:
Age-Based Inspections
- Decks over 10 years old: Materials degrade over time. Wood decks are especially vulnerable to rot, fastener corrosion, and UV damage after a decade of exposure.
- Decks 5–10 years old: Conduct a professional inspection if the deck sees heavy use, is built with lower-grade materials, or shows visible wear.
- New construction or recent renovation: A post-construction inspection verifies workmanship and code compliance, especially if you purchased a home with an existing deck of unknown origin.
Condition-Based Triggers
- Visible damage: Cracked or warped boards, sagging joists, loose railings, rust stains, soft spots, or pulling fasteners
- Water intrusion or drainage issues: Ponding water, staining on siding near the ledger, or evidence of leaks inside the home
- Unusual movement or noise: Swaying, bouncing excessively, or creaking sounds when people walk on the deck
- Insect activity: Termite tubes, carpenter ant frass, or wood-boring beetle exit holes
Event-Based Inspections
- After severe weather: Earthquakes, high winds, heavy snow loads, or flooding can stress connections and reveal hidden weaknesses
- Before property sale: Sellers benefit from pre-listing inspections to address issues proactively; buyers should always inspect decks during due diligence
- Heavy use or occupancy change: Converting a lightly used deck into a space for large gatherings, hot tubs, or heavy planters
Regulatory and Legal Requirements (California)
California has specific laws governing balcony and deck inspections for multi-family properties:
- SB 721 (apartments, condos with 3+ units): Requires inspections of exterior elevated elements by January 1, 2025, and every six years thereafter. Learn more about SB 721 requirements.
- SB 326 (HOAs, common interest developments): Mandates inspections of load-bearing components by qualified inspectors every nine years. Learn more about SB 326 requirements.
Even single-family homeowners should be aware of these standards, as they reflect best practices for deck safety statewide. Note: Exact qualifications and reporting timelines may vary by jurisdiction; always confirm with your local authority having jurisdiction (AHJ).
Recommended Inspection Cadence
- Annual visual self-check: Spring or fall, before peak outdoor season
- Professional inspection every 2–3 years: For decks over 10 years old or in harsh climates (coastal salt air, mountain freeze-thaw)
- After major events: Earthquake, wildfire proximity, or significant storm damage
See If Your Property Qualifies for an Inspection Exemption
California’s balcony and deck laws can be confusing. Take our free 2-minute assessment and instantly learn whether your property likely requires SB 721 / SB 326 inspections — or if you may qualify for an exemption.
Take the Quiz NowDeck Inspection Checklist (Homeowner Pre-Check)
This checklist helps homeowners perform a basic safety screening. It’s not a substitute for a professional inspection, but it can help you spot red flags early. Safety first: Do not climb on unstable structures or use tall ladders alone. If you find serious issues, call a professional immediately.
Ledger Board and Connection to House
- Check that the ledger (the board attached to the house) is securely fastened with lag bolts or through-bolts, not just nails or screws
- Look for gaps between the ledger and the house wall; gaps can indicate pulling away or inadequate fastening
- Inspect flashing above the ledger; it should direct water away from the connection
- Check for water stains, rot, or soft wood around the ledger area
Posts and Footings
- Verify that posts rest on concrete footings, not directly on soil
- Look for post bases embedded in concrete; this traps moisture and accelerates rot
- Check post-to-footing connections; use of metal post anchors is best practice
- Inspect for cracks in concrete footings or signs of settlement
- Feel posts for soft spots, especially near ground level where moisture accumulates
Beams and Joists
- Walk under the deck (if accessible) and check for sagging, cracks, or splits in beams and joists
- Look for signs of overloading: excessive deflection when people walk above
- Check joist hangers and ensure they’re fully engaged with nails in all holes
- Inspect for moisture stains or decay, especially where joists meet the ledger or beam
Fasteners and Connectors
- Look for rust, corrosion, or deterioration on bolts, screws, nails, and joist hangers
- Check that fasteners are tight; wiggle test posts and railings gently
- Verify use of hot-dipped galvanized or stainless steel hardware in coastal or high-moisture areas
- Look for missing fasteners, stripped screw heads, or nails pulling out
Guards and Handrails
- Height: Guards on decks more than 30 inches above grade must be at least 36 inches tall; check your local code for specifics. Stair handrails should be 34–38 inches above stair nosing.
- Spacing: Balusters must not allow a 4-inch sphere to pass through (child safety requirement)
- Strength: Apply firm pressure to top rails; they should not wobble or feel loose
- Check guard post connections to the deck frame; inadequate attachment is a leading cause of falls
Deck Boards and Surface
- Walk the deck and feel for soft, spongy, or cracked boards
- Check board fastening; boards should not lift or shift when stepped on
- Look for excessive gaps (tripping hazard) or boards that are cupping or splitting
- Inspect for protruding nails or screws that could cause injury
Stairs, Treads, and Risers
- Test stair stringers (the side supports) for stability and connection to the deck
- Check that treads are uniformly sized; variations can cause trips
- Verify handrails are present and secure on both sides if stairs are wider than 44 inches
- Look for rot at the bottom of stringers where they contact the ground
Moisture, Rot, and Termites
- Use a screwdriver to probe wood in suspect areas; healthy wood resists penetration, while rotted wood is soft and crumbly
- Look for termite tubes on posts, beams, or the house foundation
- Check for fungal growth, especially on shaded or north-facing deck areas
- Inspect drainage; water should flow away from the deck, not pool on surfaces
Quick Facts: Common Standards
- Typical guard height: 36 inches minimum for decks over 30 inches high (verify local code)
- Baluster spacing: 4-inch sphere test (no openings larger than 4 inches)
- Ledger fasteners: Lag bolts or through-bolts, not nails; spacing and size specified by code
- Corrosion resistance: Hot-dipped galvanized or stainless steel hardware required in many jurisdictions, especially coastal areas
- Flashing: Required over ledger boards to prevent water intrusion
Common Deck Failures (and Why They Happen)
Understanding how decks fail can help you target inspections and maintenance effectively. Here are the leading causes of deck collapses and structural failures, based on industry research and incident data:
Ledger Failure: The Leading Cause
The ledger board—the horizontal framing member that attaches the deck to the house—is the single most critical connection. Research indicates that ledger attachment failures account for the vast majority of deck collapses. When the ledger pulls away from the house, the entire deck can fall.
Why ledgers fail:
- Inadequate fastening: Nails or drywall screws instead of proper lag bolts or through-bolts
- Missing or improper flashing: Water infiltrates behind the ledger, rotting the rim joist or siding
- Attachment to non-structural elements: Ledger bolted to brick veneer or foam sheathing, not to the building’s structural frame
- Corrosion: Coastal salt air or trapped moisture corrodes fasteners, reducing load capacity
Prevention: Ensure ledgers are attached with appropriately sized and spaced lag bolts or through-bolts into solid framing (not siding). Install flashing correctly to shed water. Have a professional verify ledger connections on older decks.
Fastener Corrosion and Degradation
Metal fasteners and connectors are vulnerable to rust, especially in California’s coastal regions. Corroded fasteners lose strength and can fail suddenly under load.
- Common culprits: Electroplated or zinc-coated hardware (not suitable for exterior use); mixing dissimilar metals (galvanic corrosion); trapped moisture around fasteners
- Solution: Use hot-dipped galvanized or stainless steel fasteners rated for exterior exposure. Inspect and replace corroded hardware proactively.
Missing or Inadequate Flashing
Flashing is a thin metal or membrane layer that diverts water away from critical junctions (especially the ledger-to-house connection). Many older decks lack flashing entirely, allowing water to rot the ledger, rim joist, and siding.
Fix: Retrofit flashing during repairs or inspections. Proper flashing installation may require temporarily removing the ledger or siding—a job best left to professionals.
Overloading and Insufficient Design
Decks are designed for specific live loads (typically 40–50 pounds per square foot for residential use). Adding a hot tub, large planters, or hosting large gatherings can exceed design limits.
- Hot tubs: A typical 6-person hot tub filled with water weighs 3,000–4,000 pounds, often concentrated in one area
- Heavy planters: Wet soil adds significant weight; large pots can exceed 500 pounds
- Gatherings: Parties with 20+ people in a small area can temporarily overload a deck not designed for concentrated loads
Solution: Consult a structural engineer before adding heavy items. Reinforce framing if necessary. Learn more about balcony load limits.
Guard and Handrail Failures
Falls from decks result in serious injuries and fatalities. Guard failures occur when railings are improperly attached, built with insufficient strength, or have openings large enough for children to pass through.
Common issues:
- Guard posts attached only to deck boards or rim joists, not to the structural frame
- Inadequate post size or spacing
- Balusters spaced too far apart (greater than 4 inches)
- Handrail height outside code range (34–38 inches for stairs)
Fix: Reinforce guard posts with proper blocking and through-bolts. Verify spacing and height with a measuring tape.
What accounts for the majority of deck collapses? According to data from the North American Deck and Railing Association (NADRA) and building safety experts, ledger attachment failures are responsible for the vast majority—often cited as 90% or more—of catastrophic deck collapses. This occurs when the connection between the deck and the house fails, causing the deck to pull away and collapse. Proper ledger attachment with appropriate fasteners, flashing, and attachment to solid structural framing is the single most important factor in deck safety.
Other Common Failure Modes
- Post base rot: Posts embedded in concrete or sitting directly on soil absorb moisture and decay at the base, leading to sudden collapse
- Inadequate bracing: Tall decks (over 6 feet high) need lateral bracing to resist wind and seismic loads; missing bracing can cause racking
- Joist hanger misuse: Using undersized hangers, failing to fill all nail holes, or using incorrect fasteners reduces connection strength
- Weathering and UV damage: Wood degrades over time when exposed to sun and moisture cycles; composite materials can fade and become brittle
Professional Deck Inspection: What We Do
A professional deck inspection provides a comprehensive assessment that goes beyond what homeowners can safely or effectively perform. Here’s a step-by-step look at the process used by qualified inspectors and engineers:
Step 1: Intake and Documentation
Owner/Stakeholder: Property owner, manager, or HOA board
Inputs: Deck age, construction records (if available), known issues, intended use, recent events (storms, earthquakes), prior inspection reports
Outputs: Inspection scope, site access plan, safety protocol
Acceptance Criteria: Clear understanding of property history, access to all deck areas, scheduling confirmed
Step 2: Visual On-Site Evaluation
Owner/Stakeholder: Inspector, structural engineer
Inputs: Site access, ambient conditions, safety equipment
Outputs: Initial condition notes, photographic documentation, identification of areas requiring detailed examination
Acceptance Criteria: All accessible areas visually inspected; obvious defects documented; safety hazards flagged for immediate attention
- Examine ledger attachment, flashing, and interface with building
- Inspect all posts, beams, joists, and connections from below (if accessible) and above
- Evaluate guards, handrails, and stair systems for code compliance and structural integrity
- Check decking surface, fasteners, and drainage
- Look for corrosion, rot, insect damage, and weathering
Step 3: Photos and Measurements
Owner/Stakeholder: Inspector
Inputs: Camera, measuring tools, reference standards (building codes)
Outputs: Annotated photos, dimension records, guard height and spacing measurements, fastener counts
Acceptance Criteria: All critical components photographed with context; measurements recorded for code comparison
Step 4: Moisture Probing (Non-Destructive Testing)
Owner/Stakeholder: Inspector
Inputs: Moisture meter, probe tools, target areas (ledger interfaces, post bases, deck boards)
Outputs: Moisture readings, identification of wet or decayed wood, areas requiring further investigation
Acceptance Criteria: Moisture levels documented; areas with elevated moisture (>20% in lumber) flagged for decay assessment
Note: Moisture meters provide readings but cannot definitively diagnose rot. Elevated readings prompt manual probing with an awl or screwdriver to assess wood integrity.
Step 5: Connection and Hardware Review
Owner/Stakeholder: Inspector, structural engineer
Inputs: Access to fasteners (may require removal of select deck boards or finishes), code requirements, hardware specifications
Outputs: Assessment of fastener type, size, spacing, and condition; identification of inadequate or corroded hardware
Acceptance Criteria: All critical connections evaluated against code requirements; deficiencies documented with photos and measurements
- Verify ledger bolts are appropriately sized and spaced per code
- Check joist hanger nails and proper hanger installation
- Inspect post-to-beam and beam-to-post connections
- Evaluate guard post attachment to deck framing
Step 6: Findings Summary and Risk Classification
Owner/Stakeholder: Inspector, engineer
Inputs: All inspection data, photos, measurements, code standards
Outputs: Summary of findings, risk classification (low, moderate, high, immediate hazard), prioritized defect list
Acceptance Criteria: Each defect classified by severity; immediate hazards identified for urgent action
Step 7: Written Report and Recommendations
Owner/Stakeholder: Inspector, engineer, property owner
Inputs: Findings summary, code references, repair cost estimates (if provided)
Outputs: Formal inspection report with photos, description of defects, code citations, repair recommendations, timeline for action
Acceptance Criteria: Report is clear, actionable, and complies with any regulatory requirements (e.g., SB 721/326 format)
A quality report includes:
- Executive summary for quick decision-making
- Detailed findings with photos and measurements
- Code compliance assessment
- Repair recommendations with priority levels
- Suggested timeline and next steps
- Contact information for follow-up questions
Step 8: Follow-Up and Escalation (if Needed)
Owner/Stakeholder: Property owner, contractor, engineer
Inputs: Inspection report, repair bids, regulatory deadlines
Outputs: Repair plan, contractor selection, permit applications (if required), re-inspection scheduling
Acceptance Criteria: Corrective action initiated; immediate hazards addressed; compliance path established
Accessibility and Safety Limits
Not all deck components can be fully inspected without destructive testing. For example:
- Ledger bolts hidden behind siding or finished walls cannot be visually confirmed without removing finishes
- Post-to-footing connections buried in concrete require excavation for direct assessment
- Interior wood decay may not be visible externally until advanced stages
Escalation: If non-destructive methods reveal concerns, the inspector may recommend selective disassembly (e.g., removing a few deck boards) or engaging a structural engineer for load testing or invasive probing. Owners should weigh the cost of investigation against the risk of undetected failure.
Costs: What to Expect
Deck inspection costs vary based on size, complexity, location, and the depth of evaluation required. Understanding cost drivers helps you budget appropriately and avoid surprises.
Typical Cost Ranges (California, 2025)
Residential deck inspections generally fall into these ranges:
- Basic visual inspection (single-family, small deck): $200–$400
- Standard inspection with moisture testing (medium deck): $400–$700
- Comprehensive inspection with engineer review (large or complex deck): $700–$1,500+
- SB 721/326 compliance inspections (multi-family): $75–$150 per balcony/EEE, with minimum fees and bulk discounts
Note: Costs as of 2025; actual quotes may vary based on inflation, location, and specific property conditions.
Cost Drivers
- Size: Larger decks take more time; multi-level or multi-story structures add complexity
- Access: Difficult access (no crawl space below, high elevation, locked areas) increases labor time
- Age and condition: Older decks or those with visible damage require more thorough investigation
- Report depth: Detailed engineering reports with calculations and CAD drawings cost more than basic visual summaries
- Regulatory compliance: SB 721/326 inspections must meet specific standards and reporting formats, adding documentation time
- Travel: Remote locations or properties far from the inspector’s base may incur travel fees
- Additional testing: Destructive testing, lab analysis of materials, or structural load testing adds significant cost
| Scenario | Scope | Typical Range | Notes |
|---|---|---|---|
| Small single-family deck (<200 sq ft) | Visual inspection, basic report | $200–$400 | Good for routine checks or pre-sale screening |
| Medium deck (200–500 sq ft) | Visual + moisture testing, photo report | $400–$700 | Most common homeowner inspection |
| Large or multi-level deck (>500 sq ft) | Comprehensive with engineer review | $700–$1,500 | Includes code compliance assessment |
| Pre-purchase inspection (home sale) | Detailed assessment, immediate hazards flagged | $400–$800 | Often bundled with whole-home inspection |
| SB 721/326 multi-family (per unit) | Regulatory compliance inspection | $75–$150/unit | Volume pricing; minimum fees apply |
| Post-repair re-inspection | Verification of completed repairs | $150–$400 | Usually shorter than initial inspection |
Cost vs. Risk: Why It’s Worth It
A deck collapse can result in catastrophic consequences:
- Injury or death: Deck failures injure thousands annually in the U.S., with dozens of fatalities
- Liability: Property owners face lawsuits, insurance claims, and potential criminal charges if negligence is proven
- Repair costs: Emergency repairs after a failure often exceed $10,000–$50,000, far more than proactive maintenance
- Property value: Decks in disrepair reduce home value and marketability
An inspection costing $500 can identify a $2,000 repair that prevents a $50,000 failure. It’s risk management, not just maintenance.
Case Snapshot: Ledger Failure Averted
A Marin County homeowner scheduled a routine inspection before hosting a family reunion on their 15-year-old deck. The inspector found severe corrosion on the ledger bolts—hidden behind siding—and early signs of rim joist rot. The inspection cost $450. Repairs (new ledger bolts, flashing, and rot repair) totaled $3,200. Three weeks later, the deck safely held 30 guests. Had the inspection been skipped, the ledger could have failed under load, risking injuries and repair costs exceeding $40,000.
Calculate your inspection cost
Estimate your expenses effortlessly with our Balcony Inspection Cost Calculator, designed to provide accurate pricing tailored to your property’s unique needs.
Calculate Now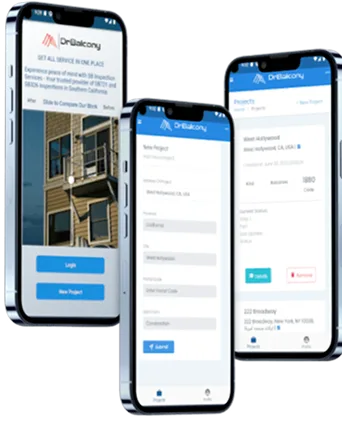
Code & Requirements (California Highlights)
Navigating California’s building codes and regulatory landscape can be complex. Here’s what you need to know about deck and balcony inspection requirements and standards:
General Building Code Requirements
California uses the California Building Code (CBC), based on the International Building Code (IBC) and International Residential Code (IRC), with state-specific amendments. Key provisions for decks include:
- Live load: 40 pounds per square foot (psf) for residential decks; 60 psf or more for decks intended for assembly or commercial use
- Guard height: Minimum 36 inches for residential decks elevated more than 30 inches; 42 inches for certain commercial applications
- Baluster spacing: 4-inch sphere rule (no opening can allow a 4-inch sphere to pass)
- Ledger attachment: Specific fastener size, spacing, and embedment requirements; must attach to solid structural framing
- Flashing: Required to prevent water intrusion at ledger-to-building connections
- Footings: Must extend below frost line (varies by region) and be sized for soil bearing capacity
Local variance: Cities and counties can adopt stricter requirements. Always check with your local building department for jurisdiction-specific codes.
California Senate Bill 721 (SB 721): Apartments and Condominiums
SB 721 (effective January 1, 2020) mandates inspections of exterior elevated elements (EEEs) for buildings with three or more multi-family dwelling units. Key points:
- Scope: Applies to balconies, decks, porches, stairways, walkways, and railings that extend beyond exterior walls and rely on wood or wood-based products for structural support
- Deadline: Initial inspections must be completed by January 1, 2025; subsequent inspections every six years
- Inspector qualifications: Licensed architect, structural engineer, or building contractor
- Reporting: Inspectors must report conditions posing immediate threat to life or safety within 15 days
Single-family homeowners are not subject to SB 721, but the standards reflect best practices for all elevated structures. Read our complete guide to SB 721 inspection requirements.
California Senate Bill 326 (SB 326): Common Interest Developments and HOAs
SB 326 (revised January 1, 2020) requires inspections of load-bearing components in common interest developments (HOAs, condominiums):
- Scope: Load-bearing components of decks, balconies, exterior stairs, walkways, and railings designed for human occupancy
- Frequency: At least once every nine years
- Inspector qualifications: Licensed structural engineer or architect; building contractors under certain conditions
- Visual-only requirement: Unless conditions warrant further investigation
SB 326 applies to common areas, but many HOAs also recommend or require homeowners to inspect privately owned decks and balconies. Learn more about SB 326 requirements.
Homeowner Responsibilities
Even if your property is not subject to SB 721 or SB 326, California law holds property owners responsible for maintaining safe conditions. Negligent maintenance can result in liability for injuries. Best practices:
- Conduct annual visual self-inspections
- Hire a professional inspector every 2–3 years for decks over 10 years old
- Address defects promptly; do not defer repairs on structural or safety items
- Keep records of inspections and repairs for future reference and property sales
Permits and Inspections for Repairs
Structural repairs (ledger replacement, joist reinforcement, guard rebuilds) typically require building permits and inspections by the local authority having jurisdiction (AHJ). Permit requirements vary by locality but generally include:
- Structural repairs affecting load paths or safety
- Guard or handrail replacement
- Ledger re-attachment or flashing installation
- Addition of heavy loads (hot tubs, large planters)
Consult your local building department before starting repairs. Unpermitted work can affect property sales and insurance coverage.
Authoritative Resources
- California Building Standards Commission: www.dgs.ca.gov/BSC (official CBC codes)
- International Code Council: www.iccsafe.org (IRC and IBC resources)
- North American Deck and Railing Association: www.nadra.org (deck safety standards)
- California Department of Housing and Community Development: www.hcd.ca.gov (SB 721/326 guidance)
DIY vs. Hiring a Pro (Comparison)
Deciding between a DIY inspection and hiring a professional depends on your experience, the deck’s condition and age, and your tolerance for risk. Here’s a side-by-side comparison:
| Option | Best For | Scope | Timeline | Typical Cost | Risks & Limitations |
|---|---|---|---|---|---|
| DIY Visual Check | Annual maintenance screening; newer decks (<5 years); homeowners with basic carpentry knowledge | Surface inspection, obvious damage, accessible areas only | 1–2 hours | $0 (or cost of basic tools) | Cannot detect hidden issues (concealed rot, inadequate fastening, code violations). No liability protection. May miss critical defects. |
| Professional Visual Inspection | Decks 5–10 years old; no visible damage; routine checkups; HOA or insurance requirements | Comprehensive visual examination, photo documentation, basic report | 1–3 hours on-site + report writing | $200–$500 | Limited by accessibility; may not include invasive testing. Some issues require follow-up with engineer or destructive testing. |
| Professional Comprehensive (with Engineer) | Decks >10 years old; visible damage; pre-sale inspections; heavy use; SB 721/326 compliance | Full structural evaluation, moisture testing, code compliance review, detailed report with recommendations | 2–5 hours on-site + report writing | $500–$1,500+ | Higher cost. May recommend additional testing or destructive probing if issues found. Best for risk mitigation and regulatory compliance. |
| Structural Engineering Assessment | Complex decks; known structural concerns; adding heavy loads (hot tub); post-collapse investigation | Load calculations, structural analysis, repair design, stamped plans for permits | 4–8 hours + design time | $1,000–$3,000+ | Most expensive option but provides liability protection, permit-ready plans, and definitive answers on structural adequacy. |
When to Escalate to a Professional
Always hire a licensed professional if you observe:
- Any movement, sagging, or instability in the deck structure
- Visible rot, especially near the ledger or post bases
- Severe corrosion on fasteners or connectors
- Loose or wobbly guards and handrails
- Water damage or leaks inside the home near the deck connection
- Pre-sale or pre-purchase situations (protect your investment and liability)
- Regulatory compliance requirements (SB 721/326)
- Decks over 15 years old with no prior professional inspection
Don’t gamble with safety. The cost of an inspection is trivial compared to the consequences of a deck failure.
Practical Tips to Extend Deck Life
Proactive maintenance can add decades to your deck’s lifespan and prevent costly repairs. Here are actionable steps every deck owner should take:
- Ensure proper drainage: Clean gutters above or near the deck. Verify that water flows away from the ledger and deck surface. Install drip edges and flashing to prevent water from running down posts or pooling on horizontal surfaces.
- Seal and protect wood: Apply a penetrating water-repellent sealer or stain every 2–3 years for wood decks. Clean and prep surfaces before sealing. Use mildewcide additives in shaded areas prone to mold and algae.
- Maintain flashing: Inspect flashing annually for damage, gaps, or improper installation. Re-seal caulk joints where flashing meets siding. Replace damaged flashing promptly; this is a job for a professional if the ledger must be disturbed.
- Upgrade hardware to corrosion-resistant materials: Replace electroplated or rusting fasteners with hot-dipped galvanized or stainless steel. In coastal areas, use marine-grade stainless steel (316 alloy). Pay special attention to joist hangers and ledger bolts.
- Prevent planter and BBQ heat damage: Place planters on stands or wheeled bases to allow air circulation and prevent moisture trapping. Use grill mats under BBQs to protect decking from heat and grease. Avoid placing hot items directly on composite decking, which can soften or discolor.
- Remove snow and debris promptly: Snow loads can stress decks, especially older structures. Clear snow carefully (avoid metal shovels that gouge wood). Sweep leaves and pine needles regularly to prevent moisture retention and mold growth.
- Check and tighten fasteners: Walk the deck annually and look for loose screws or nails. Retighten or replace as needed. Check guard post bolts, stair connections, and joist hangers.
- Trim vegetation: Keep trees, shrubs, and vines away from the deck to prevent moisture retention and insect activity. Ensure air circulation under and around the deck.
- Avoid power washing at high pressure: High-pressure washing can damage wood fibers and force water into joints. Use a fan tip, keep the nozzle 12+ inches from the surface, and work along the grain. For composite decks, follow manufacturer guidelines.
- Inspect after storms or earthquakes: Even minor events can loosen connections or shift footings. Perform a walk-through after severe weather and look for new cracks, movement, or damage.
Data-Backed Insights
- According to the North American Deck and Railing Association (NADRA), proper flashing and water management can extend deck life by 50% or more.
- A study by Virginia Tech found that decks maintained with regular sealing and fastener checks had 70% fewer structural issues after 15 years compared to neglected decks.
- The International Association of Certified Home Inspectors (InterNACHI) reports that ledger failure accounts for over 90% of deck collapses, underscoring the importance of flashing and proper attachment.
- California’s coastal climate accelerates corrosion; using marine-grade stainless steel fasteners can reduce corrosion-related failures by 80%, per industry data.
- Regular inspections (every 2–3 years for older decks) reduce the likelihood of catastrophic failure by identifying issues early, according to building safety research.
How DrBalcony Helps
DrBalcony specializes in balcony and deck inspections throughout California, with deep expertise in multi-family properties, California building codes, and SB 721/SB 326 compliance. Here’s why property owners, managers, and HOAs trust us:
Qualifications and Experience
- Licensed professionals: Our team includes licensed structural engineers, architects, and certified inspectors with decades of combined experience.
- California focus: We understand California’s unique seismic, coastal, and wildfire considerations. Our inspectors are trained on CBC requirements and regional best practices.
- Multi-family expertise: We’ve inspected thousands of balconies and decks across apartments, condominiums, and HOA properties. We know the challenges of large-scale inspections and regulatory compliance.
Inspection Methodology
Our process is thorough, efficient, and designed to minimize disruption:
- Comprehensive visual evaluation: Every accessible component is inspected, photographed, and documented.
- Non-destructive testing: We use moisture meters and probes to detect hidden decay without damaging your property.
- Code compliance review: We verify that your deck meets current California Building Code standards and identify any deficiencies.
- Risk prioritization: Findings are classified by severity (immediate hazard, moderate risk, maintenance item) so you know what to address first.
Fast Turnarounds and Clear Reports
- Quick scheduling: We offer flexible appointment times and can accommodate urgent requests.
- Clear, actionable reports: Our reports include photos, descriptions, code citations, and repair recommendations in plain English. No jargon, no confusion.
- Immediate hazard notifications: If we identify a life-safety issue, we notify you immediately (within 15 days for SB 721 compliance).
- Follow-up support: We’re available to answer questions, consult with contractors, and verify completed repairs.
Next-Step Guidance
After your inspection, we don’t just hand you a report and walk away. We help you understand your options:
- Explanation of findings and recommended repairs
- Referrals to trusted contractors (if requested)
- Permitting guidance for structural repairs
- Re-inspection services to confirm repairs meet code
- Consultation on load upgrades, seismic retrofits, or deck expansions
Ready to schedule? Take our quick compliance quiz to see if your property requires inspection, or use our cost calculator to estimate your investment.
Frequently Asked Questions
Deck inspection costs vary based on size, complexity, and location. In California, a basic visual inspection for a small single-family deck typically costs $200–$400. Standard inspections with moisture testing for medium-sized decks run $400–$700. Comprehensive inspections with engineer review for large or complex decks range from $700–$1,500 or more. Multi-family SB 721/326 compliance inspections are typically priced per unit at $75–$150 each, with volume discounts and minimum fees. Factors like deck age, accessibility, and required report detail affect the final price.
To inspect your deck, start with a visual walk-through looking for obvious damage: check boards for cracks or soft spots, shake railings to test for looseness, and look for rust on fasteners. Examine the ledger (the board attached to your house) for gaps or water damage, and verify that posts rest on proper footings, not dirt. Use a screwdriver to probe wood in suspect areas—healthy wood resists penetration, while rotted wood is soft. Check guard height (should be at least 36 inches for decks over 30 inches high) and baluster spacing (no gaps larger than 4 inches). Look underneath the deck if accessible to inspect beams, joists, and connections. For a thorough assessment, hire a professional inspector who can use moisture meters, test fastener integrity, and provide a detailed report.
Ledger attachment failures account for the vast majority—often cited as 90% or more—of catastrophic deck collapses, according to data from the North American Deck and Railing Association (NADRA) and building safety researchers. The ledger is the horizontal board that attaches the deck to the house. When it fails, the entire deck pulls away and collapses. Common causes include using nails instead of proper bolts, missing flashing that allows water to rot the ledger or rim joist, attaching to non-structural elements like brick veneer, and corroded fasteners losing their load capacity. Proper ledger attachment with appropriately sized and spaced lag bolts or through-bolts into solid framing, combined with proper flashing, is the single most important factor in deck safety.
The 3-4-5 rule is a geometric method used in deck construction to establish square corners (90-degree angles). It’s based on the Pythagorean theorem: measure 3 feet along one side, 4 feet along the perpendicular side, and the diagonal between those points should be exactly 5 feet if the corner is square. This ensures your deck frame is rectangular and not skewed, which is important for structural integrity and proper board installation. While useful during construction, this rule is not a substitute for following local building codes or engineering standards. Always verify that your deck meets California Building Code requirements for dimensions, load capacity, and connections—squareness alone doesn’t guarantee safety or compliance.
Homeowners should conduct a basic visual inspection of their deck annually, ideally in spring before heavy outdoor use. For decks over 10 years old or in harsh climates (coastal salt air, mountain freeze-thaw), hire a professional inspector every 2–3 years. After severe weather events like earthquakes, high winds, or heavy snow, perform an immediate inspection. If you notice any visible damage, unusual movement, or signs of rot, schedule a professional inspection right away. California’s SB 721 requires multi-family properties to inspect exterior elevated elements every six years, and SB 326 requires HOA common areas to be inspected every nine years—these regulatory standards reflect best practices that all deck owners should consider.
In California, the terms “deck” and “balcony” are often used interchangeably, especially in regulatory contexts. Both are elevated platforms, but balconies typically extend from upper floors and are accessed from interior spaces, while decks are usually ground-level or first-floor outdoor structures. The inspection process is essentially the same: both require evaluation of structural framing, connections, guards, decking, and moisture/corrosion issues. California’s SB 721 and SB 326 laws use the term “exterior elevated elements” (EEEs) to encompass both decks and balconies in multi-family properties. Whether you call it a deck or balcony, the key safety principles—proper ledger attachment, adequate fasteners, code-compliant guards, and water management—are identical.
Yes, composite decks need inspections even though they resist rot and insect damage. While composite decking material doesn’t decay like wood, the underlying structure—posts, beams, joists, and ledger—is usually still wood or steel and is subject to the same failure modes. Fasteners can corrode, connections can loosen, and structural framing can rot or rust. Additionally, composite decks can have issues like board fading, chalking, or fastener pullout over time. Guards and railings also require inspection regardless of decking material. Follow the same inspection schedule as wood decks: annual visual checks and professional inspections every 2–3 years for older structures or harsh environments.
It depends on the severity and type of corrosion. Light surface rust on galvanized fasteners may be acceptable if the coating is still largely intact and the fastener hasn’t lost significant cross-sectional area. However, heavy rust that has caused pitting, thinning, or structural degradation typically fails inspection because it compromises the connection’s load capacity. In California, especially coastal areas, building codes often require corrosion-resistant fasteners (hot-dipped galvanized or stainless steel). If an inspector finds corroded hardware that doesn’t meet code or poses a safety risk, you’ll need to replace it. Don’t gamble—if you see rust on critical connections like ledger bolts or joist hangers, have a professional assess whether replacement is needed.
Reviewed by: DrBalcony Engineering Team
This guide was prepared by DrBalcony’s team of licensed structural engineers and certified inspectors specializing in California deck and balcony safety. Our team has conducted over 10,000 inspections across California and maintains deep expertise in SB 721, SB 326, and California Building Code compliance.
Last reviewed: September 30, 2025
Service area: California (San Francisco Bay Area, Los Angeles, San Diego, Sacramento, and statewide)